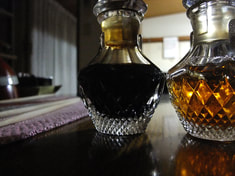
It also means catching up on stuff around the house - such as processing all of our extra butternut squash for freezing for later use in soups and pies, and making a batch of red wine vinegar from some old Pinot Noir we had sitting around open from a couple of weeks ago.
As you may know if you've been reading this blog for a while, I love fermenting stuff! :-) It's so much fun, plus it's simple, easy, and interesting - and the result is almost always very tasty.
I started off with fermented vegetables (kimchi, sauerkraut, etc.), then moved on to hard cider, hard ginger ale, and most recently, wine vinegars.
If you want to try making your own vinegar, there are lots of ways you can do it, but the easiest way to start is with wine, since that's already fermented so you've got a good head start. You COULD just leave some wine open and uncorked for a while and it would eventually turn into vinegar. However, the results could be unpredictable so it may not turn out as you had hoped or expected. But if you culture the wine with some raw, natural vinegar, it should develop into a lovely wine vinegar for you over the course of a few weeks - just follow the super easy steps below...
1 1/2 cups red or white wine (or beer, for malt vinegar)
1/2 cup raw, organic vinegar with the mother (Bragg's or similar)
Choice of Ingredients:
The basic recipe that I listed above is what I have used, but feel free to experiment with different types of wines, or even beer - which would become malt vinegar. Try different wine varietals - Cabernet, Pinot Noir, or Chianti for red wine vinegar, or Chardonnay, Sauvignon Blanc, or Chenin Blanc for white wine vinegar. Or you can use a blend.
I like to use the leftover wine from a bottle that we didn't finish that has sat around open for a bit and isn't that tasty anymore for drinking. Sometimes, I have a couple of different bottles like this, so I may combine them together to make a batch of vinegar. So far, our homemade red wine vinegar has been absolutely delicious! It has a musky depth to it that you just don't find in store-bought vinegars (in fact, it's making my mouth water just thinking about it)... I have not tried white wine vinegar or malt vinegar yet, but the process should be the same.
If you make a batch that turns out well, you can save some to use as your culture for the next batch. Or, you can start new, using raw, organic apple cider vinegar as the culture. (You want the kind that has the "mother" like Bragg's.) If you don't have enough of your own culture left for a full batch, you can also use whatever you have and make up the difference with Bragg's or a similar vinegar.
As I mentioned, since wine is already fermented, it's actually not that picky, and it's a pretty darned easy process. (I've read that you can also purchase a vinegar mother online, but I have never done this - I've just always used Bragg apple cider vinegar to culture mine.)
Fermentation:
To ferment your vinegar, you will simply want to combine your wine with your culture in a glass container, and cover it with a piece of cloth or cheesecloth, secured with a rubber band to keep out fruit flies (Fun Fact: their real name is vinegar flies). Let sit in a reasonably dark place for at least 2 weeks. It may take quite a bit longer - as with any fermentation process, the speed will depend a lot on the temperature. Warmer temperatures mean a faster ferment, but too warm may cause your ferment to go bad. Generally I have found that 70-75 degrees F. is the best range for a good ferment that doesn't take too long - and this is also true for vinegar.
You should stir (or gently swirl) your vinegar every few days, and taste it every couple of days after the first 2 weeks. Once it has reached a sharp acidity similar to store-bought vinegar, it is ready. But don't give up if it develops some funny flavors before then. As the fermentation progresses, it may go through a few different stages, with different scents and flavors that aren't necessarily delicious. Hang in there, and give it some time. Patience is key when it comes to fermentation!
Storage:
Once your vinegar has reached its desired acidity, you can pour off the top 3/4 of the vinegar and bottle it. (Toss the dregs in the compost - these are full of yeast and probably won't taste good.) Place your finished vinegar in an air-tight bottle or jar, with as little empty air space as possible, and refrigerate. The flavor will continue to develop slowly with refrigeration, and it should keep for several months - if you can resist using it up before then, which may be difficult in my experience! :-)
Have you tried making your own vinegars? Comment below and share your thoughts and experiences!
Rose.


 RSS Feed