One of the best ways to establish and maintain healthy gut bacteria is to eat fermented foods on a regular basis. This is something that we in America rarely do anymore. In fact, the only fermented food that still remains popular in our culture today is yogurt, and often store-bought yogurts are packed with so much sugar and contain so little live bacteria as to be all but useless.
I highly encourage you, for the sake of your health, to start consuming more fermented foods! The recipe below is a great way to do so. If you don't like cabbage, you can also pickle other vegetables using natural fermentation methods. And there are plenty of other fermented foods you can make as well, including yogurt (which is super easy to make at home), kefir, and kombucha tea.
Natural fermentation is not only easy to do at home, but it is also safe, and really fun! And once you develop a taste for fermented foods, you'll probably start to crave them like I do. :-)
Here's how to make a classic naturally fermented sauerkraut - plus a variation for spicy kimchi if you're feeling more adventurous. (Note: This recipe makes approximately 1 quart, but may easily be doubled if desired. The kimchi recipe may make about 1 1/2 quarts due to the additional ingredients. To make a half-gallon, use a larger head of cabbage, and double the salt.)
Ingredients:
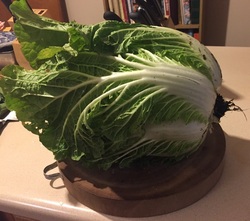
- 1 small to medium head of cabbage (either regular green, red, or Napa/Chinese varieties all work fine).
- 1 TB natural sea salt (get the kind that is not bleached, and do NOT use table salt! I use Celtic Light Gray Coarse Sea Salt. Real Salt would also be fine.)
Other Items You Will Need:
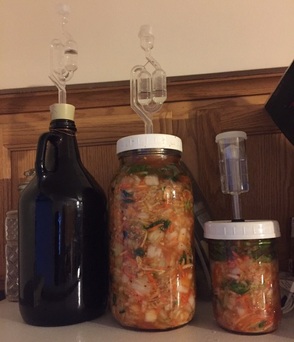
- A fermenting crock, OR a clean wide-mouth quart mason jar and an air-lock lid, such as The Perfect Pickler
- A large, sharp knife and clean cutting surface, or a mandoline slicer - preferred (you don't have to have one, but it makes the prep a lot faster and easier)
- A clean kitchen towel
- A shallow dish in case of leakage (optional*)
Directions:
- Reserve 2-3 good-sized leaves from your cabbage, then shred or finely slice the rest of the head, and put into a large glass bowl.
- Sprinkle with 1 heaping TB sea salt.
- Using a mallet or (my favorite) the bottom of a pint mason jar, pound cabbage lightly for a few minutes. Then let sit for an hour or so.
- When you return, you may see a bit of brine forming in the bottom of the bowl. Continue pounding cabbage for a few more minutes, until a half cup to a cup of brine forms.
- Pack your cabbage tightly into your crock or jar, making sure to leave about 1" head space at the top for your brine cup or crock rock.
- Cut your reserved whole cabbage leaves into pieces slightly larger than the mouth of your jar (if using a crock, you may need to save an extra leaf, and leave them whole), then seal them firmly over the shredded cabbage and tuck the edges down the sides a bit if you can, to thoroughly cover all of the kraut.
- Pour the remaining brine over, until full according to the directions on your crock or the Perfect Pickler.
- If using The Perfect Pickler, seat the overflow cup, put on the lid, tighten, and add your air-lock. (Set in a shallow dish in case of overflow if desired.) Otherwise follow instructions for your fermenting crock.
- Place your crock or jar in a dark place with fairly constant temperature - you want it to remain around 70-degrees Fahrenheit. If it is slightly cooler, it will take longer to ferment. If it is slightly warmer, it may be done sooner, so check it earlier.
- Let ferment it for 4-5 days. I usually check it on Day 4, but for me it typically takes another day or two, at least if I'm fermenting in the winter.
- On Day 4 or 5, remove the lid, and taste your kraut. If it doesn't taste sour enough, replace the lid snugly and let ferment another day, then re-taste until you are satisfied. (Note: Naturally fermented kraut will not have a strong sour taste like vinegar - it will be more of a mild tangy flavor.)
- When done, remove the lid and airlock, and cap with a regular air-tight lid (if using a crock, transfer to a glass jar with tight-fitting lid). Refrigerate. Flavor will continue to develop in the refrigerator, and your kraut should keep for several months.
- Eat a few bites every day to maintain healthy bacterial flora - and your health!
| Fermented Kimchi Additional Ingredients:
|
- Follow directions as listed above, but after Step 4, add remaining Kimchi ingredients to the cabbage, pound for another minute or so, and then mix well before packing into crock or jar.
* Notes: Although the plate underneath is optional, I highly recommend it! I went without it the last time I made kimchi, and the fermentation was so vigorous (and jar was probably over-full) that the brine leaked out and overflowed all over the top and down the sides of the refrigerator! Lesson learned.
Also, I encourage you to use organically grown vegetables whenever possible. Not only will this help you avoid pesticide residues, but some conventionally grown vegetables are irradiated or treated with other chemicals which may interfere with the proper development of the healthy bacteria necessary for fermentation.
As you can see, kimchi - and especially kraut - is pretty easy to make, and it is absolutely delicious, and super healthy. Learning about natural fermentation is fun and interesting (or maybe I'm just a nerd), and once you get the hang of it, you can try experimenting with your own recipes. It is quite safe as long as your workspace and utensils are clean, and even so, if you ever have a bad batch (which I did once with an improperly-lidded batch of fermented turnips - this was before I got my airlock, so don't be tempted to try it without - trust me), you will know immediately by the smell and taste.
If you want to learn more about making your own fermented foods, I highly recommend The Art of Fermentation, by Sandor Katz. It's my "fermentation Bible," and covers everything from pickles, to fermented beverages, breads, cheeses, and more. It's fun to read, interesting, and full of details on everything you need to know about fermentation, including precautions, suggestions, and plenty of recipes to try.
Live healthy!
Rose.


 RSS Feed